This is a tutorial to get nice some martial landscape models. The best part is they are actually exact replicas of martian landscapes captured by scientists. Some of them are well nice.
First Go and get some mars real estate. Here there are some amazing images, at very high resolution, the part we're interested are the Digital Terrain Models.
Pick one, for this example I am using Becquerel.
Some of them have artefacts. For a quick look, click the one at the bottom of the second column, labeled color altimetry. This one is good, there are no strips or faceting in the craters.
Start downloading. If you want just the height map, you need only get the .IMG file, which is always on the top of the left column DTM&Orthoimages. Note that this one is 544mb, and is probably ~20k pixels long with a 32bit depth.
You may notice that is is not possible to successful view the .IMG and .JP2 files.
Infranview will allow you to open the JP2s and save them off as something you can open in photoshop, I chose .tif.
There is a lower res .jpg that you can use as a height map, but it's only 8bits deep so your terrain goes all steppy.
I had problems opening the .IMG files with infranview, or in fact a number of other programs. Fortunately for me, I have access to Adam Foster
https://hylobatidae.org/ who gave me instructions that I will pass on.
You will need GDAL, the fantastically named 'Geospacial Data Abstraction Library'
I had already downloaded it with the FWtools bundle, but since it was a command line thing, I ran away.
It does have a UI, called OpenEV - but I could not get good results out of it, everything was always just black and I didn't know what type of file to save it as.
1. Install the FWtools. Wherever you like. In windows explorer navigate to the FWTools2.4.7 folder, Copy or move your downloaded .IMG file into this folder. Hold shift and right click in the window, select 'Open command window here'
Gdal has a bunch of different .bat files in the bin folder, for now we want to use gdalinfo in -stats mode.
So type bin/gdalinfo -stats DTEEC_025782_2020_025637_2020_A01.IMG
You may want to rename the .IMG to something less cumbersome (ctrl v does not work in command line, you have to right click on the title bar and go edit>paste)
Highlighted in green are the interesting parts. The pixel dimensions; 7042 by 19778 and the height, -4438.48 to -4115.047
We are going to now use gdal_translate.exe to convert the .img to a .gtiff.
-of is the command that changes the file type, gtiff
-ot changes the bit depth, here we are turning it down to a 16 bit with uint16.
-scale has you enter the height range of the original image that we got from gdalinfo, and tell it to use only that range to fill up the 0 to 65535 levels of the new 16bit greyscale. Then give it a name, becquerel_height.tif
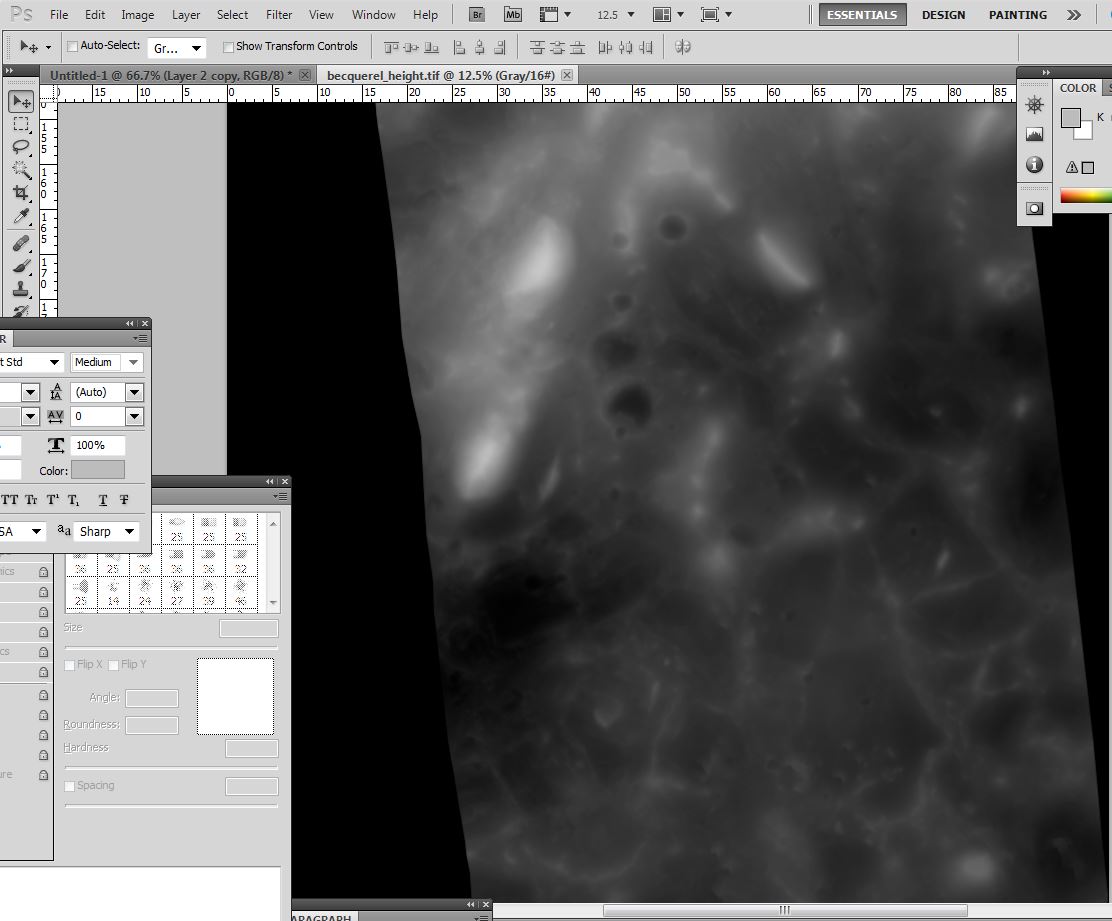
Bing! Our new file becquerel_height.tif can now be opened in photoshop.
You have a nice big dispacement map to use as you please now.
Notice how the height is nicely distributed over the full range of the image. The first time I did this I missed the minus from the maximum part of the -scale command (-4114) and the image was really dark.
I chose to make a hi res model in mudbox.
Create a plane and subdivide it as far as you dare, I went level 9 at 26million triangles.
Next go to Maps>Sculpt using map, choose your plane and load in your height map. Often you need a bit of muliplier, you have to experiment.
The result. Turn it down a few Sub divisions to about a million polys, then export as an obj.
It's distorted because these images are usually strips, bu you can just rescale the plane to squish it right.
In maya it looks like this. You can get more resolution out of the DTMs, bake normal maps out from the mubox file, etc.
Someone will probably get good results using directly as a displacement map.
Bye!
-WNr-7155-RAF-West-Malling-1943-01.jpg)


.jpeg)


.JPG)
.JPG)
.JPG)
.JPG)
.JPG)


